Building a retaining wall isn't just about stacking blocks; it’s an engineered solution to South Texas’s unique landscaping challenges. The real work is in what you can't see: the meticulous planning, precise excavation, a compacted gravel foundation, and a robust drainage system working tirelessly behind the scenes. Getting these fundamentals right is what separates a retaining wall that adds value for a lifetime from one that fails in a few years, especially here in South Texas.
This guide provides the practical, actionable advice you need to understand what goes into a successful retaining wall project.
Laying the Groundwork for a Lasting Retaining Wall
Before you buy a single block, it’s crucial to understand what makes a retaining wall successful. This isn't just a decorative garden border; it's a structural barrier designed to hold back thousands of pounds of soil. Whether you're in Corpus Christi trying to reclaim a sloped yard or in San Antonio carving out a patio space, the core principles of solid construction remain the same.
Every successful wall is built on three pillars: a rock-solid foundation, smart drainage, and the right materials for the local climate. Cutting corners on any of these will lead to a leaning, bulging, or completely failed wall down the road—a costly and dangerous mistake.
Why Planning is Everything in South Texas
You can't use a cookie-cutter approach in places like Harlingen or Brownsville. Our soil is a mixed bag—from expansive clay that swells and shrinks dramatically with moisture to sandy loam that behaves completely differently. A professional plan must account for your specific property.
Before breaking ground, ask yourself a few key questions:
- What is the goal? Are you stopping erosion on a hillside, creating a level area for a new patio, or adding a terraced garden bed? The wall's function determines its design.
- What soil am I working with? Clay soils put immense hydrostatic pressure on a wall as they absorb water, while sandy soils require a different support strategy to prevent erosion.
- What are the local regulations? Most cities, including Corpus Christi and San Antonio, require a permit and an engineer's stamp for any wall over four feet high. Skipping this step is a risk to your safety and property value.
The demand for these projects is growing for a reason. In 2024, the global retaining wall block market was valued at around USD 3.5 billion. That number is on the rise as more property owners develop challenging landscapes. This isn't just a local trend; it's a worldwide recognition of how vital these structures are. For a deeper dive, you can explore more data on the retaining wall block market.
A well-built retaining wall does more than just hold back soil. It protects your property from erosion, creates usable outdoor living space, and adds significant value to your home. The number one reason walls fail? A poor foundation or inadequate drainage. It's that simple.
Choosing the right material is one of your first big decisions. The South Texas climate is tough—scorching sun, torrential downpours, and high humidity demand materials that can take a beating.
Here's a quick look at some of the most common options and how they stack up for our region.
Retaining Wall Material Comparison for South Texas Climate
| Material Type | Average Cost (per sq ft) | Lifespan | Best For | Maintenance Level |
|---|---|---|---|---|
| Concrete Blocks | $25 – $40 | 50-100 years | Versatile for straight or curved walls, DIY-friendly for smaller projects. | Low |
| Poured Concrete | $30 – $50 | 50-100+ years | Tall, heavy-duty walls needing maximum strength and a modern look. | Low |
| Natural Stone | $35 – $60 | 100+ years | Rustic, high-end aesthetic; works well with natural landscapes. | Low |
| Timber (Treated) | $20 – $35 | 15-20 years | Budget-friendly projects, raised garden beds, and rustic designs. | Medium (can rot) |
| Gabion Baskets | $20 – $45 | 50-100 years | Excellent drainage, modern/industrial look, effective for erosion control. | Very Low |
Ultimately, the right material is a balance between your budget, aesthetic goals, and the specific demands of your project.
At Fischer Landscaping, we help homeowners and businesses in Corpus Christi, San Antonio, and beyond make sense of it all. From designing robust hardscaping services to engineering effective drainage solutions, our team ensures your project is built to last. If you're weighing your options, understanding the long-term benefits of hiring a professional is a great next step.
Planning Your South Texas Retaining Wall

Before a single shovel hits the dirt, a successful retaining wall project starts with a thorough site evaluation. Here in South Texas, the terrain from Corpus Christi to Brownsville presents unique challenges, from tricky slope angles to stubborn clay soils.
Taking the time to walk the property and understand its specific needs is non-negotiable. A professional assessment identifies where erosion is already a problem and maps out how water drains across your yard. Getting this right from the start saves weeks of rework and ensures your wall effectively does its job, whether it's holding back a hillside, creating a terraced garden, or framing a new patio.
Nail Down the Site Assessment
A proper assessment is more than just a quick look. It's about gathering hard data.
- Measure the slope. Professionals use tools like a transit level to get precise angles. This data determines how much force your wall will need to resist.
- Map the trouble spots. Pay attention after a heavy rain. Where does water pool? Where is soil washing away? These are your erosion hotspots.
- Analyze the soil. The expansive clay common in our area behaves very differently from the sandy loam you might find closer to San Antonio. Soil type dictates your foundation and drainage strategy.
This groundwork directly influences every other decision, from material selection to your final budget. For instance, on a recent project in a Brownsville backyard with a 12° slope, a simple straight wall wouldn't have been strong enough. We designed a series of stepped block tiers to safely manage the grade and prevent failure.
Our experience on countless job sites shows that an accurate site assessment can shorten a project's timeline by as much as 30%. It’s the most important first step to a successful build.
Don't Skip the Paperwork: Permits and Utility Checks
Before you get too deep into the design, you need to handle the red tape. Permitting requirements can vary between South Texas cities, so checking with the local building departments in places like Corpus Christi or San Antonio is a must.
And never dig without calling 811 first. It’s a free service that marks underground utility lines, preventing a dangerous and expensive accident. You should also mark your property lines precisely to avoid any disputes with neighbors down the road.
A few key points to remember:
- Most areas allow walls up to four feet high without a special permit, but always verify with your local municipality.
- Taller walls almost always require plans stamped by a licensed engineer for safety and compliance.
- Keep all your permits and approved site plans together in a project folder for easy reference.
Define Your Wall's Dimensions and Look
With the technical assessment done, you can focus on the aesthetics. What do you want this wall to accomplish for your space? Get specific about its height, length, and overall style. A wall built purely for soil containment has different structural needs—and therefore different block requirements—than a short, decorative border for a flower bed.
Consider how the wall will integrate with your existing landscape. You could mix classic split-face concrete blocks with natural stone caps for added texture. On sloped lots, terraced walls are a fantastic solution, breaking up a tall, imposing structure into smaller, more visually appealing levels.
A Real-World Example
On a recent Fischer Landscaping project near Corpus Christi, the client needed a wall along a 20-foot stretch of their yard that had a 3-foot rise. To complement their pool deck, they chose a design with a 45-degree stepped terrace. This not only looked great but also distributed the soil load more effectively, ensuring long-term stability.
Figuring out these details upfront brings clarity to your budget and schedule, meaning fewer surprises later. If this phase feels overwhelming, understanding why hire a professional landscaping company in Corpus Christi, TX can show you how an expert streamlines the entire process.
How to Avoid Common Pitfalls
We've seen projects go sideways, and it's almost always due to skipping one of these early steps.
Ignoring drainage patterns is a classic mistake that leads to hydrostatic pressure—water building up behind the wall. Eventually, that pressure will cause any wall to bulge, crack, or fail. You have to give that water a path to escape.
Another common issue is underestimating materials. Nothing stalls a project faster than running out of blocks or gravel halfway through. Use your layout sketches to carefully calculate everything you'll need.
“Skip a single step in the planning phase, and I guarantee that wall will be leaning within a few months. Do it right, do it once.” – A Fischer Landscaping expert
Your Next Steps
With a solid plan in hand, you’re ready to move forward. The next move is to get a professional evaluation. Contact our South Texas team to schedule a full site assessment. We work with homeowners and businesses across Corpus Christi, Brownsville, San Antonio, and Harlingen. At Fischer Landscaping, we use tools like laser-level site mapping to ensure absolute precision from the very beginning.
Ready to build with confidence? Request a complimentary quote from Fischer Landscaping today to get your project started on the right foot.
Getting the Ground Ready for a Rock-Solid Foundation
Any seasoned builder will tell you: a retaining wall is only as good as the ground it's built on. If you want a wall that stands the test of time in South Texas, you cannot skimp on the prep work. Proper excavation and a solid, compacted base are the bedrock of a successful project, preventing the settling and shifting that can ruin your investment.
This is especially critical here. The clay soils we often see around Harlingen and Brownsville love to swell and shrink with rain, while the sandy loams near San Antonio have their own compaction quirks. A professionally prepared trench and base are what stand between your wall and these powerful natural forces.
Marking and Digging Out the Trench
First, you need to map out your wall's exact location. A few stakes and a tightly pulled string line are your best friends here. This simple guide ensures your trench is straight and your wall ends up exactly where you envisioned it.
With your path marked, it's time to start digging. The size of your trench isn't a guess; it's determined by your wall's planned height and the specific blocks you've chosen.
- How Deep? A good rule of thumb is to dig down 1/8th the total height of the wall, plus another 6 inches. So, for a standard 4-foot wall, you're looking at a 12-inch deep trench (6 inches for your base material and 6 inches to bury that first course of blocks).
- How Wide? Make the trench at least 12 inches wider than your wall blocks. You'll need that extra room on the sides for the drainage aggregate and pipe.
For any significant project in Corpus Christi or San Antonio, renting a mini-excavator will save your back and a ton of time compared to digging it all out by hand.
Building a Level and Compacted Base
Once your trench is dug, you can start building the foundation. This is a crucial layer of compacted aggregate that spreads the wall's weight and gives water a path to drain away.
Start by pouring a layer of crushed stone—typically ¾-inch clean stone—into the trench until it's at least 6 inches deep. It's important that it's "clean" stone, meaning it doesn't have a lot of dust or fine particles, so water can flow through it freely.

Now comes the critical part: compaction. You need to compact that gravel layer until it's completely solid. A hand tamper works for small jobs, but a plate compactor is far more effective. As you work, constantly check that the base is perfectly level—not just side-to-side, but front-to-back as well. Use a long carpenter's level for this. Any imperfection here will be magnified as you build up.
I can't stress this enough: a perfectly level and compacted base is the single most important part of building a wall that won't fail. If you rush this step, you're guaranteeing a leaning wall within a year. Take the extra time to get it right.
At Fischer Landscaping, we rely on professional compaction gear and laser levels to ensure a perfect foundation. Our experience with local South Texas soils means we know exactly what base depth and aggregate will work best for your property. Our hardscaping services team can handle the entire process, from excavation to the final block. Many of these same principles apply to creating a sustainable yard, which you can learn more about in our guide to the basics of xeriscaping.
Stacking and Reinforcing Your Wall, Course by Course
Once your foundation is solid and perfectly level, it’s time to start stacking blocks and seeing your wall take shape. This stage is all about patient, precise work. Every course must be aligned, level, and set back correctly to build a structure with the strength to hold back tons of South Texas soil.
We typically work with segmental block systems. These blocks are designed to lock together, adding strength and making it easier to keep everything straight. The segmental block retaining wall market was valued at around USD 513 million in 2025, a testament to their reliability for all kinds of projects.
Laying That All-Important First Course
The first row of blocks—the "base course"—is the foundation for the entire structure. It has to be perfect.
Start by setting your first block at one end of the leveled gravel base. Use a rubber mallet to firmly seat it, then use a level to check that it's level from front to back and side to side. Continue laying blocks next to each other, following your string line and ensuring their faces are flush and perfectly level with the previous one.
Take your time here. I can't stress this enough. Even a tiny error on this first course will get magnified with every row you add. A 1/4-inch mistake at the bottom can easily turn into a multi-inch lean by the time you get to the top.
Creating the Batter and Staggering Joints
With each new layer, you will create a batter, which is a slight, intentional lean back into the hillside. Most modern interlocking blocks make this easy with a built-in lip or pin system that automatically creates the necessary setback. This lean is non-negotiable; it uses gravity to fight back against the immense pressure from the soil behind it.
To give the wall maximum strength, you must also stagger the vertical joints between the courses, just like in a brick wall. You can achieve this by starting every other row with a half-block, which is easy to cut with a masonry chisel or saw. This simple step turns a stack of blocks into a single, unified structure.
Using Geogrid for Taller, Stronger Walls
If your wall is over three or four feet tall, reinforcement is not a suggestion—it's a requirement. This is where geogrid becomes your best friend. It’s a high-strength, flexible mesh that is laid between courses and stretched back into the soil, essentially lacing the wall into the earth it’s holding back.
Installing it is straightforward:
- After you complete a course, roll a sheet of geogrid out over the top of the blocks, extending it several feet back into the hillside.
- Set the next course of blocks right on top of it to lock the front edge in place.
- Pull the geogrid tight, stake it down in the back, and then add and compact your backfill material over it.
For a project in the Rio Grande Valley, we built a 6-foot wall to create a usable backyard. The heavy clay soil there exerts immense pressure. By layering geogrid every two courses, we anchored that wall deep into the hillside, eliminating any chance of it bulging or failing. This technique is a fundamental part of our professional hardscaping services and is what separates a weekend project from a structure built to last for decades.
Mastering Drainage And Backfill Techniques

Building a rock-solid retaining wall in South Texas means mastering water management. When storms dump inches of rain, the resulting hydrostatic pressure can destroy a poorly built wall.
A professional drainage plan prevents cracks and bulges and reduces long-term maintenance. Here’s how our team ensures your wall stands tall for years to come.
- Installing perforated drain pipes right behind the base course.
- Layering clean gravel backfill for uninterrupted water flow.
- Using filter fabric to stop soil from clogging the drainage system.
Positioning Drain Pipes
The placement of your drain pipe is critical. It must be positioned at the base of the wall with a slight slope to ensure water continuously drains away.
- Excavate a small trench about 6 inches behind the base course, maintaining a 1/8 inch per foot slope.
- Place a 4-inch perforated drain pipe (wrapped in a fabric sock) with the holes facing down.
- Connect the pipe to a downhill outlet or a pop-up emitter away from the wall.
Properly placed drainage can reduce wall failures by up to 60% in high-rainfall areas like coastal South Texas.
This system prevents water from pooling behind the wall, protecting your investment.
Backfill Layering And Compaction
The key to a stable wall is backfilling in thin layers (lifts) and compacting each one thoroughly.
| Material | Lift Height | Compaction Goal |
|---|---|---|
| ¾-inch clean gravel | 8 inches | Compact until solid |
| Sandy Loam | 6 inches | 95% Proctor Density |
| Clay Mix | 4 inches | 90% Proctor Density |
Key steps for success:
- Lay filter fabric against the back of the trench to separate the drainage zone from the native soil.
- Place at least 12 inches of ¾-inch clean gravel directly behind the wall blocks.
- Backfill behind the gravel in lifts, compacting each layer with a plate compactor or hand tamper.
- Continue this process until you reach the top of the wall.
Proper compaction eliminates voids where water can gather and create pressure. This step is non-negotiable for a long-lasting wall.
Maintenance And Soil Considerations
Regular check-ups keep drains clear and walls in perfect shape. After every heavy rainfall, walk the perimeter and clear debris from drainage outlets. In areas with heavy clay soil like Brownsville, you may need to check that your drainage system remains clear of fine sediment over time.
For more eco-friendly water management ideas, you can explore sustainable landscaping tips on our xeriscaping page.
A Harlingen homeowner reported a 25% boost in wall lifespan after adding a secondary drain that ties into a French drain system.
Ready to safeguard your investment? Let Fischer Landscaping design a professional drainage and backfill plan tailored to your property.
Extending the Drainage Network
On larger walls or sloped sites, a network of lateral drains can prevent water from building up anywhere. This may involve tying into a larger French drain system or directing excess flow into rain gardens for natural infiltration. According to EPA guidelines, managing stormwater properly is key to preventing erosion and structural damage.
Partner with Fischer Landscaping for a full site assessment and a drainage blueprint that fits South Texas conditions. Build a wall you’ll never have to worry about—schedule your free consultation today.
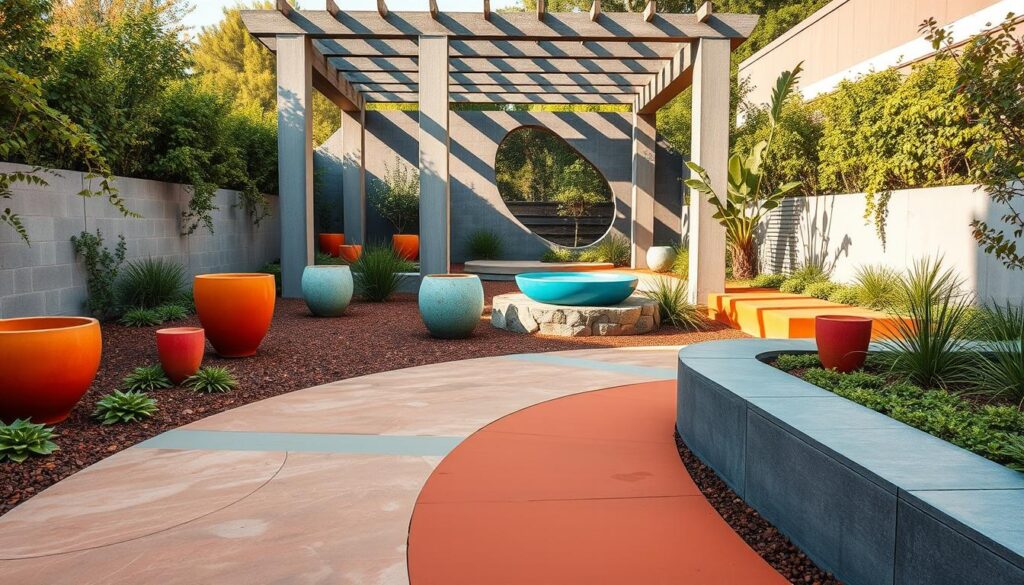
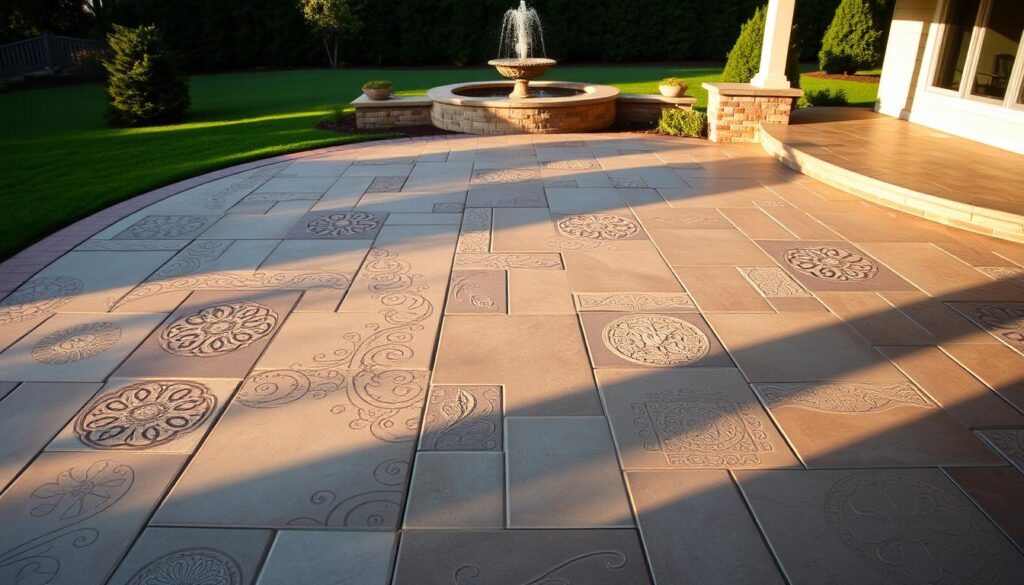
Finishing Walls For Aesthetic Appeal And Durability
Once the structural work is complete, the final touches transform your retaining wall from a functional barrier into a beautiful landscape feature. Finishing details protect the wall from South Texas weather while enhancing its visual appeal.
Capping the wall with quality coping stones is essential. It seals vulnerable joints and directs rainwater away from the wall's core. For example, limestone or precast concrete caps with a slight overhang will shed water effectively, preventing it from seeping into seams and causing damage over time.
Consider these custom touches to elevate your design:
- Built-In Seating: Integrate benches using the same materials for a cohesive and functional outdoor living space.
- Planter Pockets: Leave openings in the wall to create built-in planters for seasonal flowers or drought-tolerant succulents.
- Integrated Lighting: Recess low-voltage LED lights under the caps to highlight the wall's texture and improve safety at night.
For large-scale applications, Mechanically Stabilized Earth (MSE) walls are a robust, cost-effective option. This sector is growing rapidly, expected to reach USD 4.2 billion by 2028. Learn more about MSE wall market insights.
Adding Protective Coping Stones
Choosing the right coping material protects the wall's core and adds a polished look. A proper overhang and flexible adhesive are key to keeping water out.
- Opt for natural stone or precast concrete to resist UV fading and wear.
- Use a high-strength, flexible construction adhesive that can handle temperature changes.
- Ensure at least a 1-inch overhang to channel runoff away from the wall face.
Properly installed coping stones can extend your wall’s lifespan by up to 20%, especially in our coastal climate.
Incorporating Custom Features
Adding seating, planters, and lighting turns a retaining wall into a versatile outdoor asset.
- Seating Extensions: Design the top course to serve as a built-in bench.
- Planter Blocks: Use specialized blocks or leave cores open, fill with soil, and plant with your favorite foliage.
- LED Lighting: Install waterproof LED strips under the caps and connect them to a timer or smart-home system.
Monitoring Seasonal Climate Effects
South Texas swings from scorching summers to mild winters, which can stress masonry joints. A twice-yearly check helps catch minor issues before they become major headaches.
- Inspect for cracks in joints during peak summer heat.
- After heavy storms, clear away any debris that could trap moisture.
- In cooler, damp months, check for moss or algae growth.
Biannual inspections can extend a wall's life by up to 15% in coastal regions like Corpus Christi.
Routine Maintenance Checklist
Keep your wall in top condition with this simple, season-tailored care plan:
| Task | Frequency |
|---|---|
| Inspect Joints for Cracks | Monthly |
| Clean Surface with Mild Detergent | Quarterly |
| Clear Debris from Drainage Outlets | Biannually |
- Check caps and sealant annually for wear.
- Remove weeds or roots at the base to prevent them from undermining the foundation.
- Use a stiff broom to keep gravel drainage areas clear of leaves and debris.
Partnering For Customization
No two properties in Harlingen or Corpus Christi are the same. Fischer Landscaping brings material samples to your property so you can see how different blocks, caps, and features will look in your space.
- Choose from a range of colors and textures that complement your home.
- Visualize proportions with an on-site consultation.
- Finalize cap and lighting styles with expert guidance.
Ready to add the finishing touches? Contact Fischer Landscaping to explore cap designs, built-in seating, and lighting solutions. Explore our hardscaping services, lighting solutions, and maintenance plans. Request your custom quote for Corpus Christi, Brownsville, San Antonio, or Harlingen today.
Common Questions About Retaining Walls
Building a retaining wall is a significant investment, and it’s natural to have questions. From permits and costs to the risk of failure, getting clear, professional answers is key to a successful project. Here are some of the most common questions we hear from homeowners and businesses across South Texas.
How High Can I Build Without A Permit?
This is the number one question we get. In most South Texas municipalities like San Antonio and Corpus Christi, you can typically build a wall up to four feet high without needing a permit. This measurement is taken from the bottom of the foundation footing to the top of the wall cap.
However, this is a general rule, and local codes can vary. Furthermore, if your wall is on a steep slope or supports extra weight (a "surcharge," like a driveway or pool), the rules change. The smartest move is to always confirm with your local building department. As part of our service, Fischer Landscaping handles all necessary permitting to ensure your project is fully compliant.
What Is The Most Common Cause Of Wall Failure?
The answer is almost always one thing: water. Specifically, poor drainage. When rain soaks the ground behind a wall and has nowhere to go, it creates immense hydrostatic pressure. That waterlogged soil becomes incredibly heavy and pushes relentlessly against the structure. Eventually, the wall will bulge, crack, or fail completely.
That's why a professionally engineered drainage system—including gravel backfill, a perforated drain pipe, and quality filter fabric—is not an optional feature; it's absolutely critical. Especially in areas like Harlingen and Brownsville where heavy downpours are common, skipping this step is asking for a costly failure.
Should I DIY Or Hire A Professional?
For a small, decorative garden wall—perhaps under two feet high on level ground—a DIY approach can be a rewarding project.
However, once a wall is retaining a significant amount of soil, is over three feet tall, or is built on any kind of slope, it's time to call in the professionals. There is significant engineering involved in designing a safe and durable wall. A professional crew has the heavy equipment for proper excavation and compaction, and they understand the unique soil and drainage challenges we face in South Texas. A poorly built wall isn't just an eyesore; it's a serious safety hazard and a financial liability.
"A DIY wall might save you money upfront, but a professionally engineered wall built by an experienced team saves you from catastrophic failure and costly repairs down the road. It’s an investment in safety and peace of mind."
How Much Does A Professional Wall Cost In South Texas?
The cost of a retaining wall can vary significantly based on several key factors: the materials you choose, the wall's height and length, site accessibility, and the complexity of the design.
As a general ballpark, homeowners in our area can expect to invest somewhere between $25 to $60 per square foot for a professionally installed segmental block wall. Natural stone, poured concrete, or walls with intricate features will typically be at the higher end of that range.
The only way to get an accurate number for your project is to request a detailed quote. A professional can conduct a site assessment and provide a precise estimate based on your specific needs and property conditions.
Ready to build a retaining wall that’s not only beautiful but also engineered to stand the test of time? The team at Fischer Landscaping has the expertise to guide your project from the first sketch to the final stone, ensuring it meets the highest standards of safety and quality for your South Texas property.
Request your free, no-obligation quote from Fischer Landscaping today!